Quickstart
By the end of this tutorial, you’ll have a full-featured documentation site, complete with API and SDK reference documentation.
Requirements
Section titled “Requirements”Before getting started, you’ll need the following:
- A Stainless account: Sign up for a Stainless account at app.stainless.com. The Stainless Docs framework is open-source, but you’ll need a Stainless account to generate API reference pages and set up hosting for your site. Instructions for using Stainless Docs without a Stainless account are coming soon!
- Node.js: Stainless Docs requires Node.js 22 or higher. Run
node -vto check the version you have installed. If Node.js isn’t installed, or if you have an older version, we recommend you download and install the latest version. - The Stainless CLI: Run
stlto see if you have our command line interface installed. If not, install it.
Once you have your Stainless account, Node.js 22+, and the Stainless CLI installed you’re ready to get started.
Create your site
Section titled “Create your site”- Login to your Stainless account at app.stainless.com
- Select the project you want to create documentation for
- Go to the API Docs tab
- Press the Get started button
When pressed, the Get started button will do the following:
- Create a site in your Stainless dashboard
- Create a new GitHub repository containing your site’s source code
- Assign your site a staging domain
- Start a deploy of your site to the staging domain
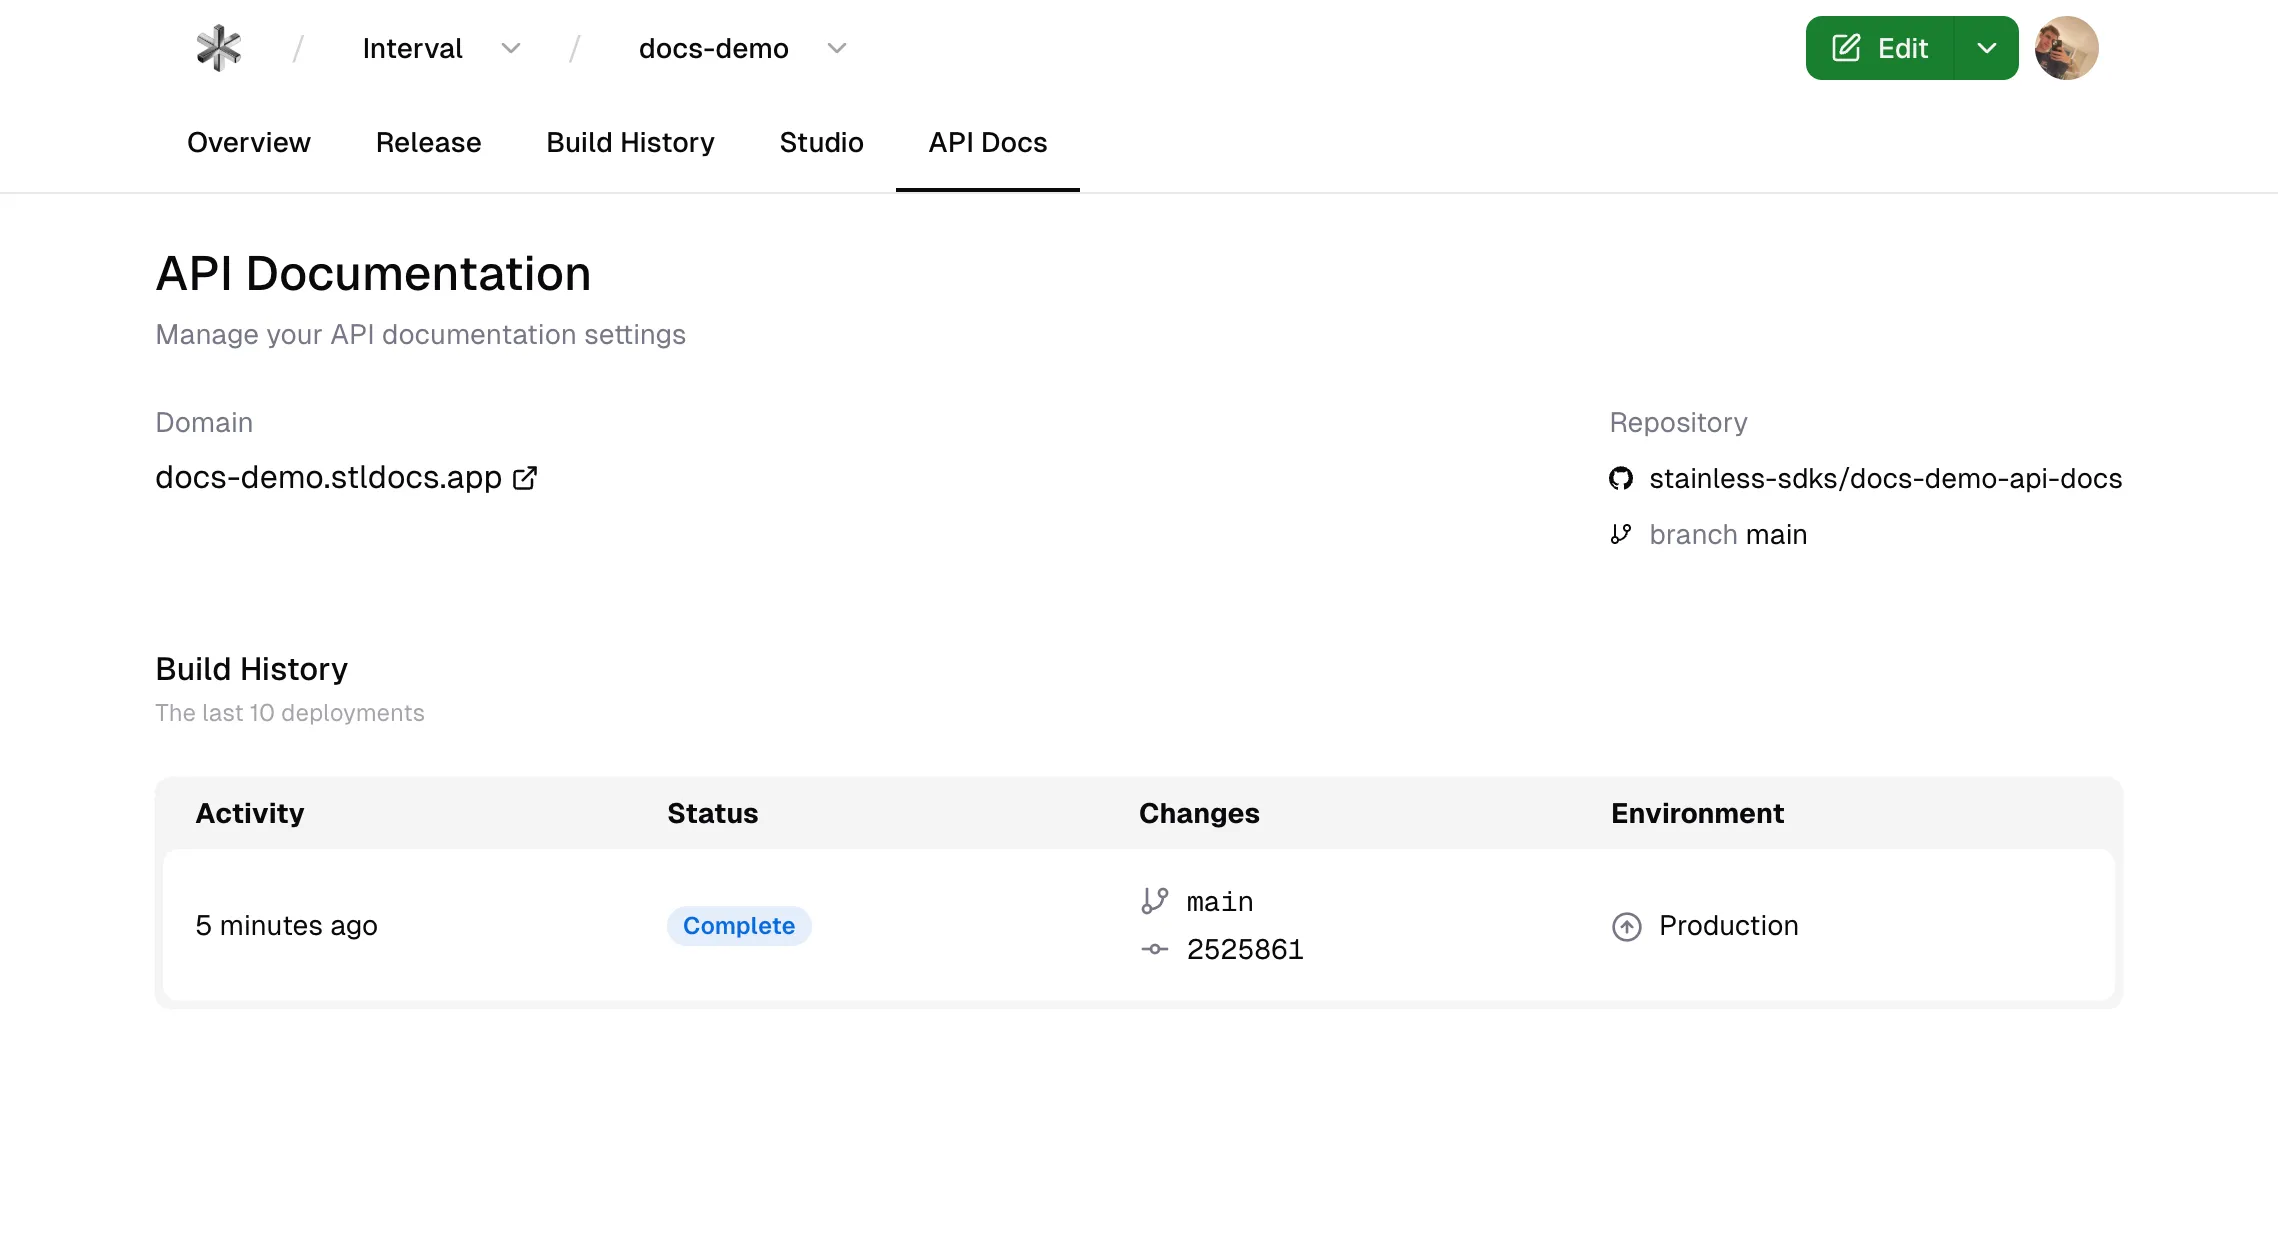
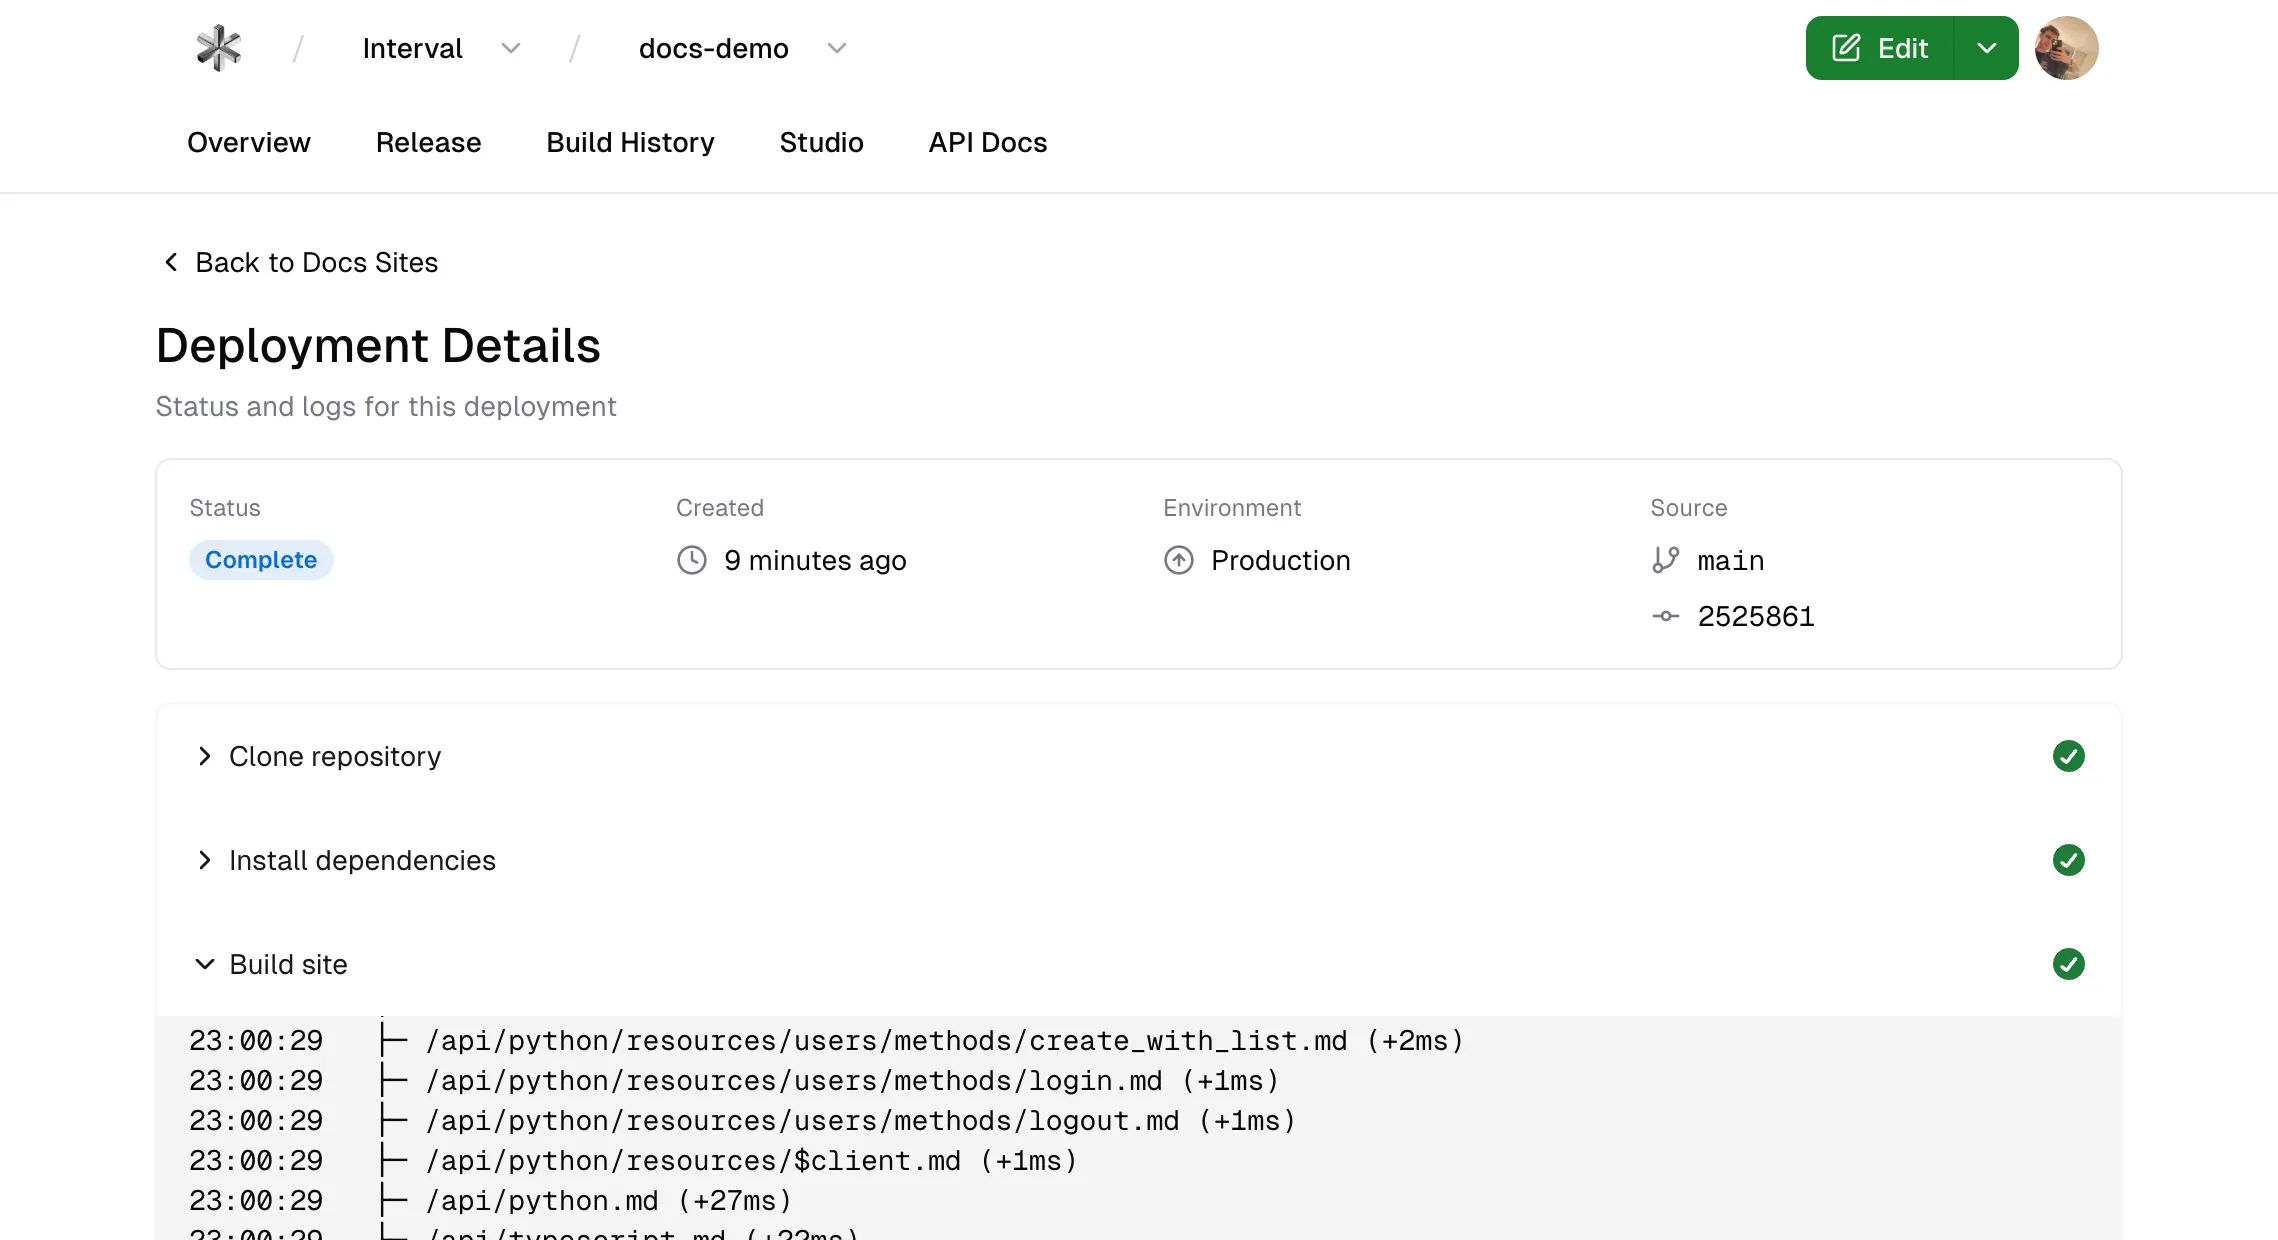
The API Docs tab in the Stainless dashboard shows the domain, repository details, and build and deployment history for your site.
Select a build in the Build History section to see the details of that build, including complete logs.
Clone, run, and view your site locally
Section titled “Clone, run, and view your site locally”Once you’ve created a Stainless Docs site, the next step is to view, edit, and iterate on it locally, on your own computer.
Clone your site’s repository
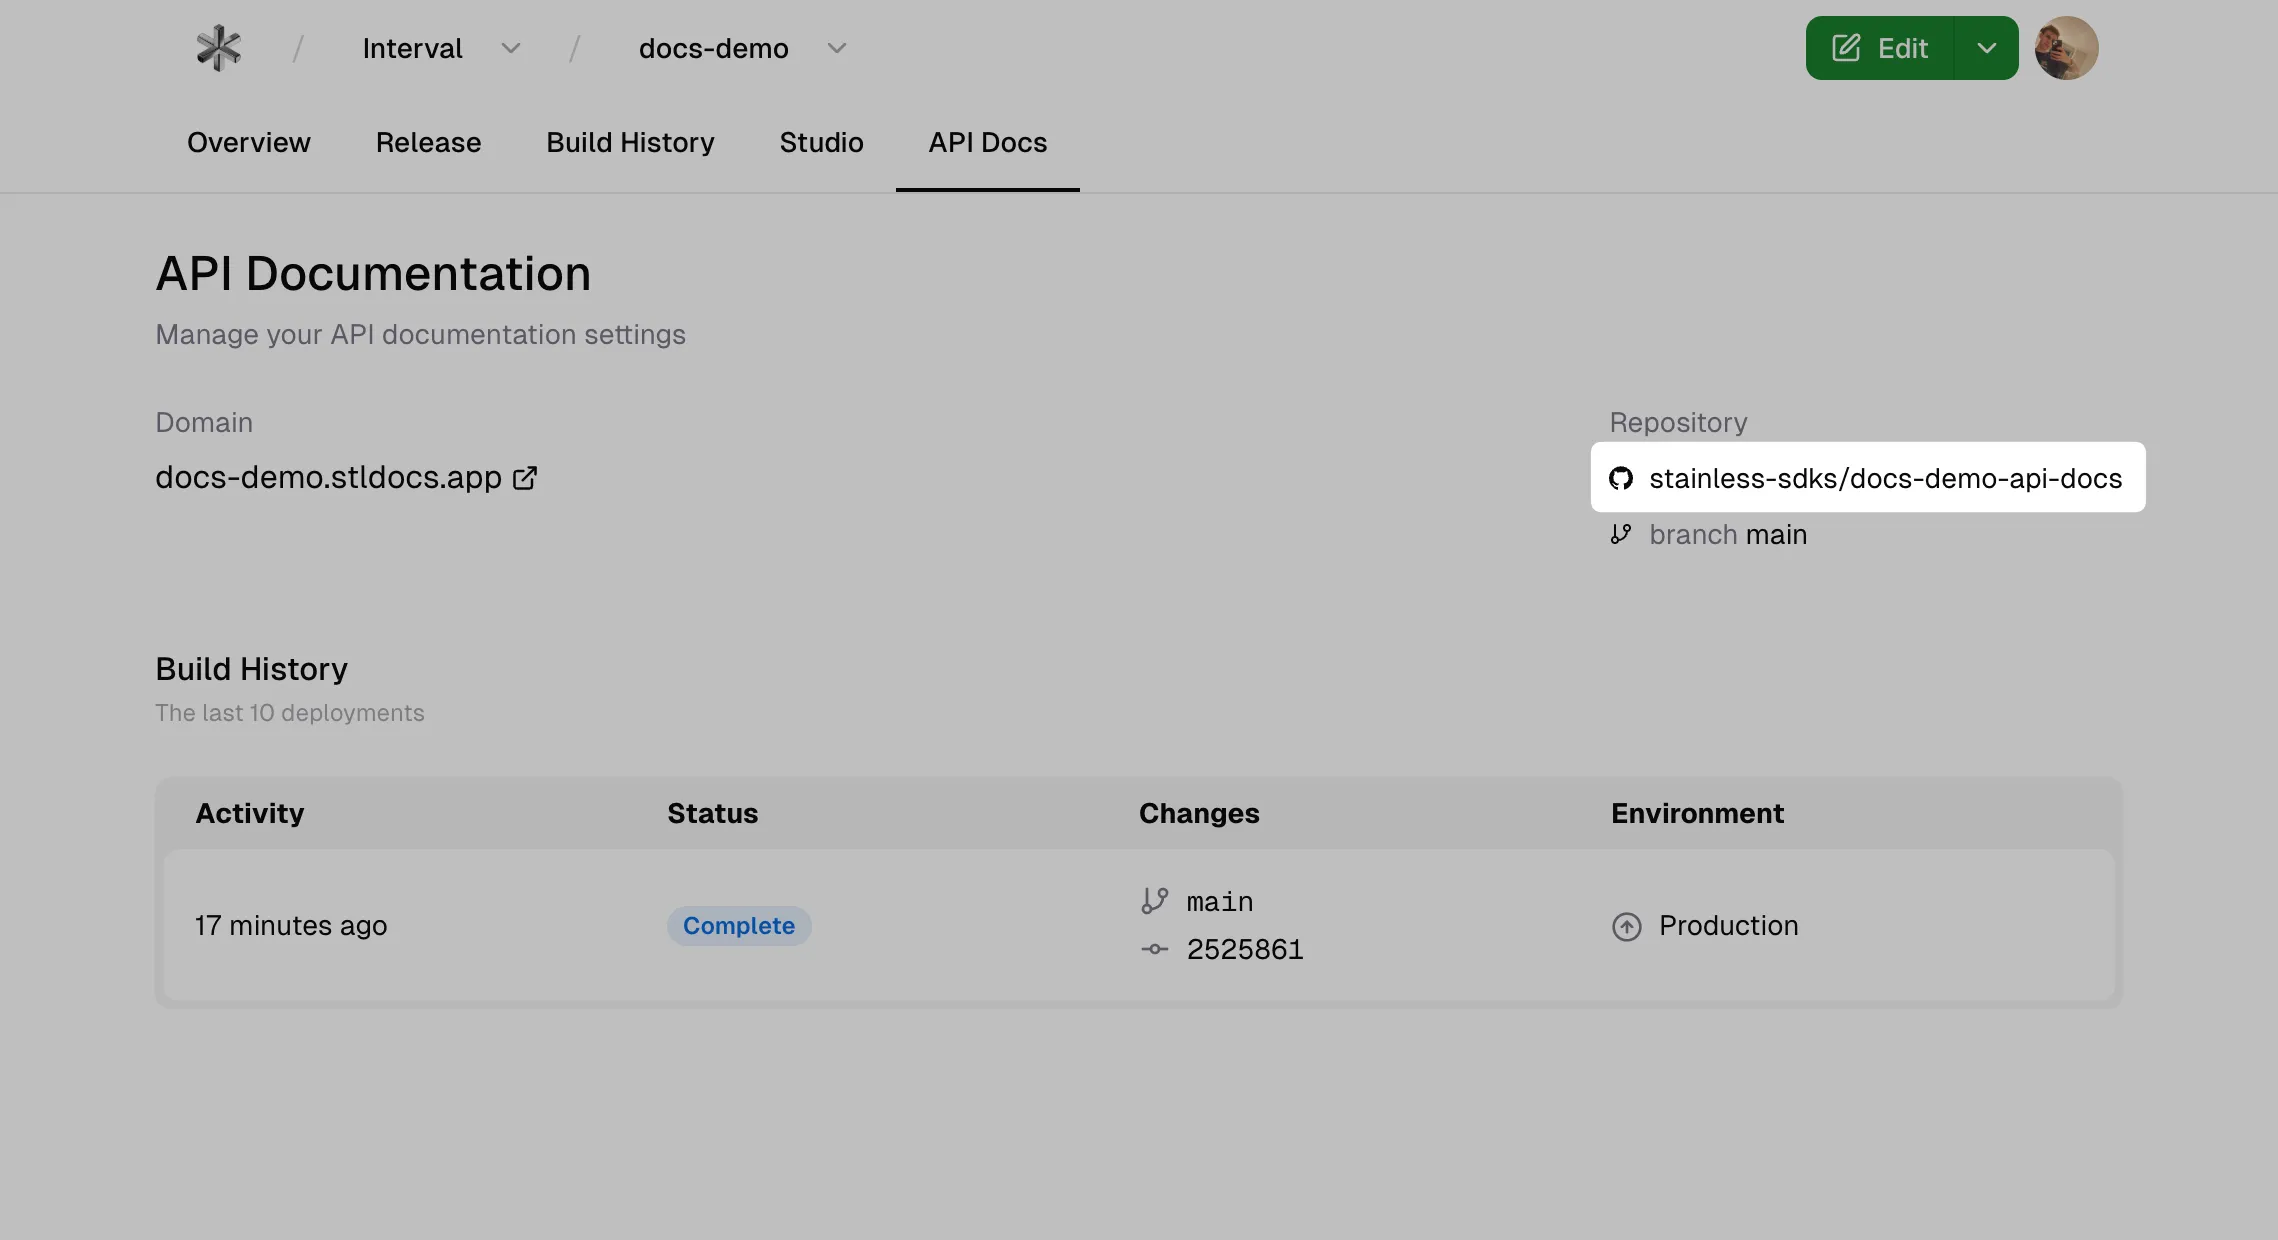
Section titled “Clone your site’s repository”When your site’s GitHub repository was created, you should have received an invitation to access it. In the Stainless dashboard, under the API Docs tab of your project, click on the link to the repository to view it on GitHub:
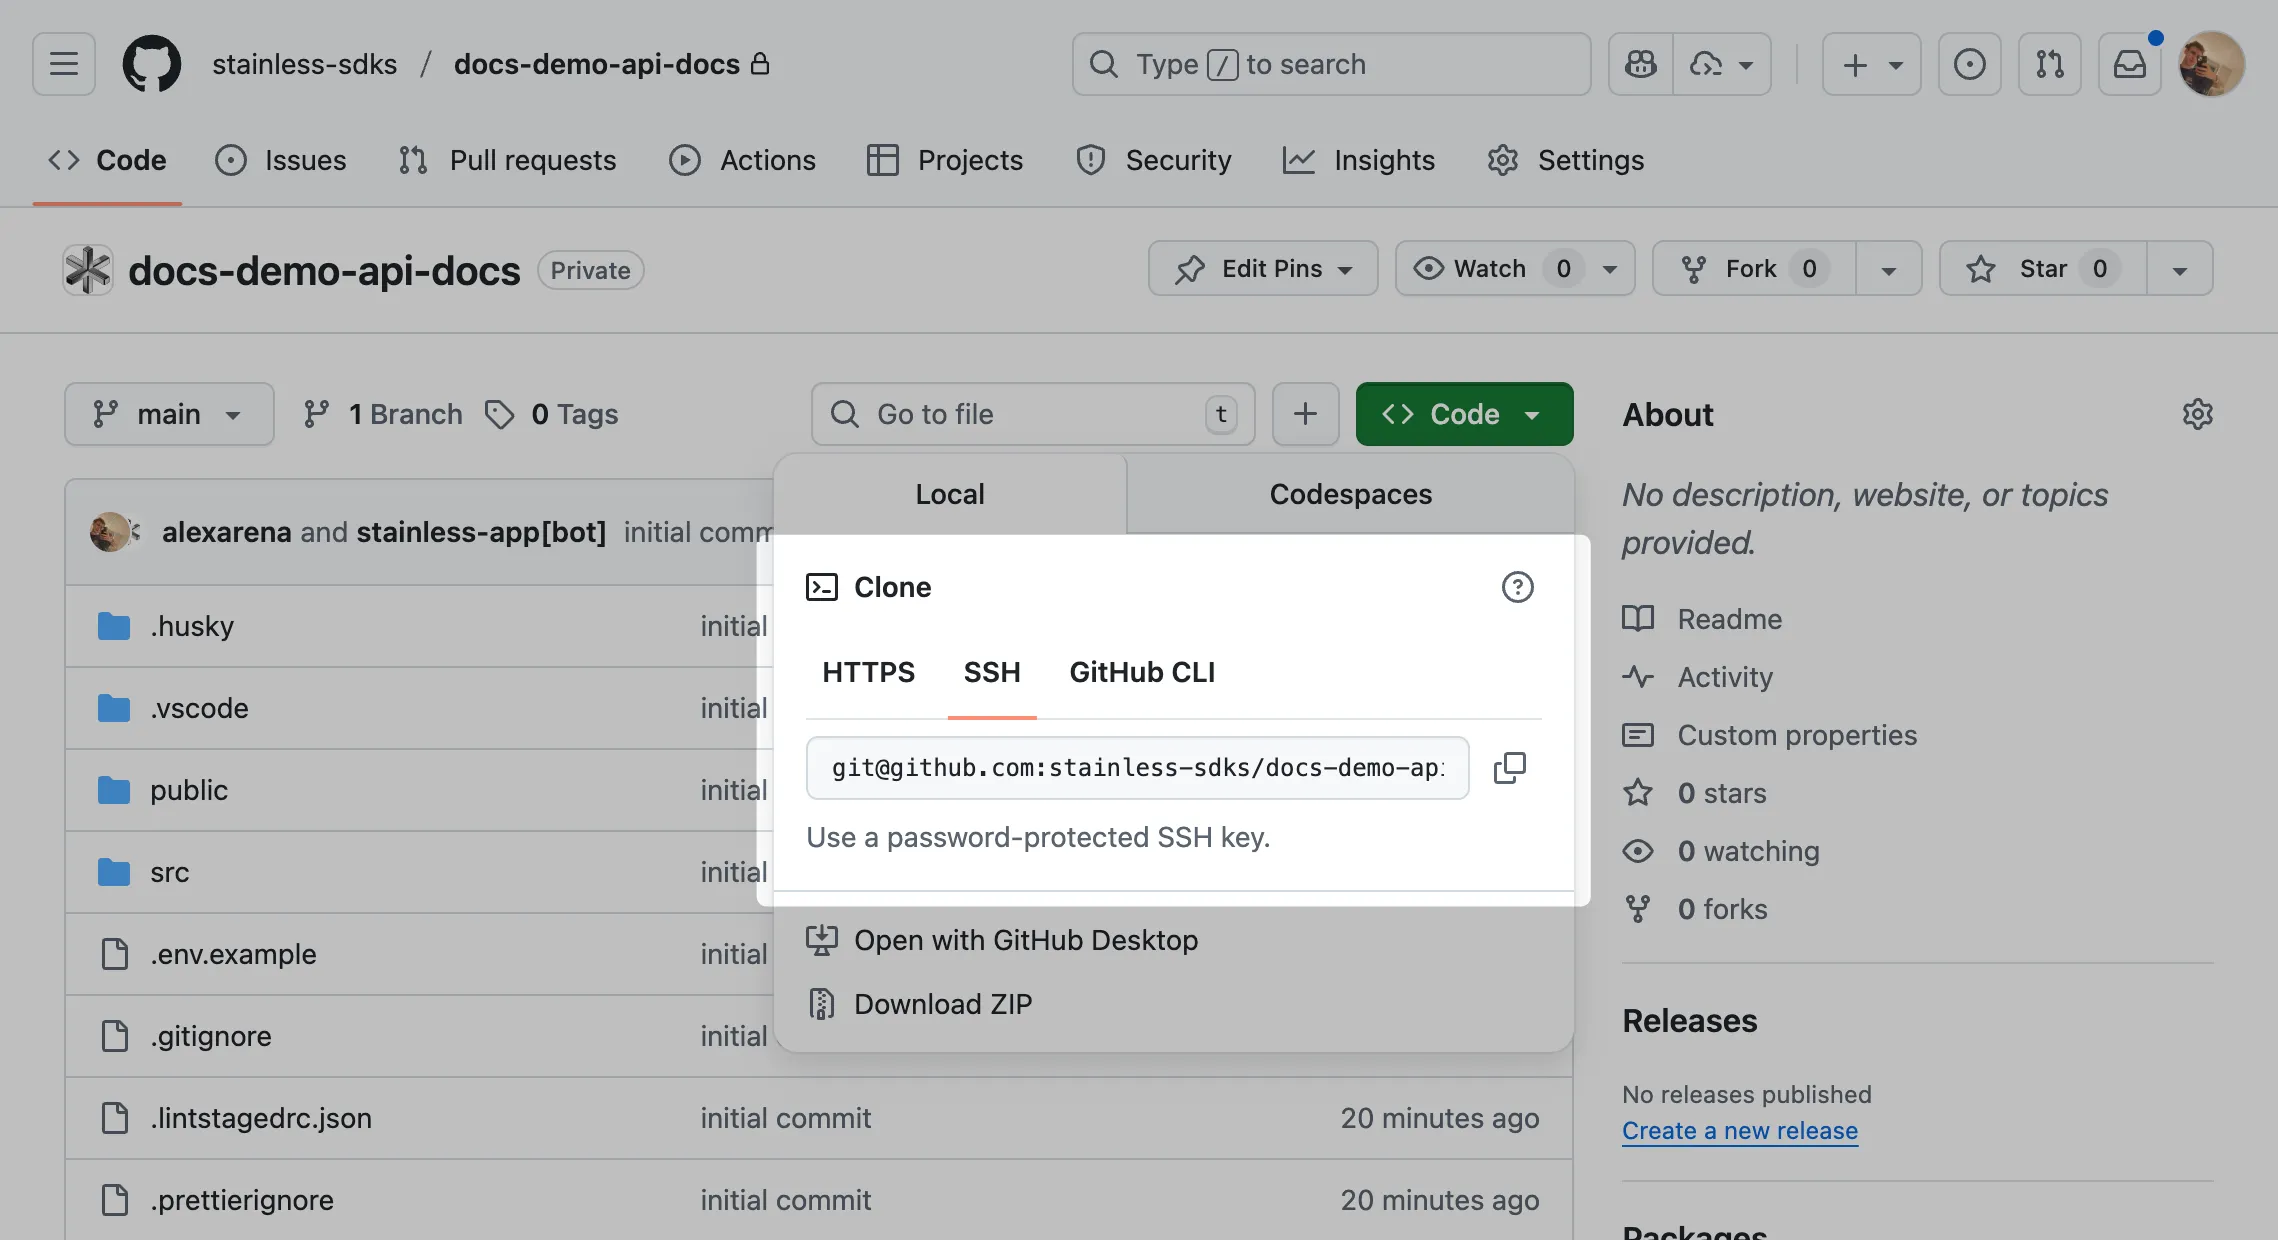
Next, make a local clone the repository from GitHub.
If you’re not familiar with GitHub or cloning a GitHub repo, have a look at their documentation for cloning repositories for more information.
Once you’ve cloned the repository, open the repo’s directory and you should see a file structure similar to this:
📁 <root>├─ 📁 public/├─ 📁 src/│ ├─ 📁 assets/│ └─ 📁 content/│ └─ 📁 docs/├─ 📄 astro.config.ts└─ 📄 package.jsonFor a detailed explanation of how your site’s files are structured, see our project structure documentation.
Install dependencies
Section titled “Install dependencies”Your site has some dependencies that need to be installed before it will run. Open a command line in the cloned repository’s directory and run the following command to install the required dependencies:
pnpm installInstalling the dependences may take a few minutes depending on the speed of your computer and internet connection. Once you’re back at the command prompt, proceed to the next step.
Authenticate with Stainless
Section titled “Authenticate with Stainless”In order to generate API and SDK reference pages, you’ll need to authenticate with Stainless. This can be done in one of two ways:
- Use the Stainless CLI
- Manually provide an API key in a
.envfile
Use the Stainless CLI
Section titled “Use the Stainless CLI”If you haven’t logged in with the CLI yet, run this command and follow the instructions:
stl auth loginTo confirm you’re logged in, run this command:
stl auth statusUse the .env file
Section titled “Use the .env file”If you would prefer to use the .env file approach instead, follow these steps:
- Inside your site’s cloned repository on your computer, make a copy of the
.env.examplefile and name it.env(these files are hidden, so you may not be able to see them by default) - Go to your org settings in the Stainless dashboard; if you have multiple orgs, make sure the one associated with your site is shown in the top left
- Press the Create new API key button
- Copy your new API key
- Open your
.envfile and paste your new API over the placeholder value - Save your
.envfile
Your .env file should now contain a line that looks like the following, where stl_sk_... is the API key you pasted in:
STAINLESS_API_KEY="stl_sk_..."Open your site
Section titled “Open your site”To preview your site locally, run this command:
pnpm devYou should see output that ends with watching for file changes... which indicates your site is now running on a local development server.
You should also see a URL in the output, which is the local web address you can use to open your site in your web browser. In most cases, your site will be available at http://localhost:4321, but the port number at the end may be different if the default port is already in use.
Now that your local development server is running, whenever you make a change to a file, you’ll see the changes reflected in your web browser immediately.
To stop your local development server, go to the command line where it’s running and press Control + C.
Make changes
Section titled “Make changes”Your Stainless Docs site is an Astro project that you fully own and control, so you can change the style, content, and structure of your site to meet your needs.
To familiarize yourself with how your site works, make some of the changes outlined below.
Change page title and content
Section titled “Change page title and content”The content of the first page you see on your docs site is in src/content/docs/index.mdx. Open that file in your editor of choice.
At the top, you’ll see some YAML metadata between two --- lines, which is called frontmatter. One of the properties in that frontmatter is the page’s title, which by default is Hello, World!.
Lower down in this same file, you’ll see the content of the page, including the Stainless logo followed by some text.
Open this page in your web browser, then change the page’s title and some of the content in index.mdx and save the file. Your web browser should automatically reload the page and display your changes.
---title: Hello, World!title: Fancy New Title!description: Get started building your docs site with Stainless.---
import { Card, CardGrid } from "@astrojs/starlight/components";import Image from "astro/components/Image.astro";import steel from "../../assets/steel.png";
<Image  src={steel}  alt="The Stainless logo"  style="height: 200px; width: auto;"/>
Welcome to your Stainless Docs site!And some fancy new content!
...
Add your logo
Section titled “Add your logo”In most cases, you’ll want to add your logo to your site. We recommend using an SVG image, but any format supported by Astro will work.
First, place your logo in your src/assets directory. If you have a dark mode variant of your logo, add it to the same directory.
If you don’t have a dark mode variant of your logo, specify a logo object with a src property:
import { defineConfig } from "astro/config";import { stainlessDocs } from "@stainless-api/docs";
export default defineConfig({  integrations: [    stainlessDocs({      title: "My Docs",      logo: {        src: "/src/assets/logo.svg",        replacesTitle: true,        alt: "My Docs",      },    }),  ],});
If you have a dark mode variant of your logo, specify a logo object with light and dark properties:
import { defineConfig } from "astro/config";import { stainlessDocs } from "@stainless-api/docs";
export default defineConfig({  integrations: [    stainlessDocs({      title: "My Docs",      logo: {        light: "/src/assets/logo-light.svg",        dark: "/src/assets/logo-dark.svg",        replacesTitle: true,        alt: "My Docs",      },    }),  ],});
You can also add your logo to your front page:
---title: Fancy New Title!description: Get started building your docs site with Stainless.---
import { Card, CardGrid } from "@astrojs/starlight/components";import Image from "astro/components/Image.astro";import steel from "../../assets/steel.png";import logo from "../../assets/logo.svg";
<Image  src={steel}  alt="The Stainless logo"  src={logo}  alt="Your logo"  style="height: 200px; width: auto;"/>
And some fancy new content!
...
Configure API reference pages
Section titled “Configure API reference pages”Out of the box, Stainless Docs generates authoritative reference pages for your API and SDKs. These pages are generated using information about your Stainless project from the Stainless API. If you’ve set up your project following this guide, you should already have an API reference section like the one below in your Stainless Docs config:
import { defineConfig } from "astro/config";import { stainlessDocs, generateAPIReferenceItems } from "@stainless-api/docs";
export default defineConfig({  integrations: [    stainlessDocs({      title: "My Docs",      apiReference: {        stainlessProject: "my-project", // this is the slug of your Stainless project        basePath: "/api", // this is the default, and can be omitted      },    }),  ],});
The configuration above will generate API reference pages at /api off of your site’s URL.
While you can manually add these pages to your sidebar, we recommend using the generateAPIReferenceItems helper function to automatically generate sidebar items for all API reference pages:
import { defineConfig } from "astro/config";import { stainlessDocs, generateAPIReferenceItems } from "@stainless-api/docs";
export default defineConfig({  integrations: [    stainlessDocs({      title: "My Docs",      apiReference: {        stainlessProject: "my-project", // this is the slug of your Stainless project        basePath: "/api", // this is the default, and can be omitted      },      tabs: [        {          label: "API Reference",          link: "/api",          sidebar: generateAPIReferenceItems(),        },      ],    }),  ],});
Add a new page
Section titled “Add a new page”In addition to autogenerated reference pages, your site can contain hand-written prose pages. You can use these pages for a variety of things, like overviews, tutorials, guides, and more.
To add a prose page, add a new Markdown file in your src/content/docs directory.
---title: Product overviewdescription: This is a description of the page---
## Hello, world!
Lorem ipsum dolor sit...
Prose pages in Stainless Docs are processed by Starlight under the hood. The only required frontmatter field is title, but you can add any field from the Starlight frontmatter reference.
Apply custom CSS
Section titled “Apply custom CSS”To add custom CSS to your site, add a customCss property to your Stainless Docs config:
import { defineConfig } from "astro/config";import { stainlessDocs } from "@stainless-api/docs";
export default defineConfig({  integrations: [    stainlessDocs({      title: "My Docs",      customCss: ["/src/styles/styles.css"],    }),  ],});
Deploy your site
Section titled “Deploy your site”When you’re happy with the local version of your site, commit your changes to your repository’s main branch and push to GitHub. When you push to main, Stainless will automatically build and deploy your site. You can see the status of current and past builds in the Stainless dashboard.
Additionally, if you’ve configured API reference pages for your site, whenever your API or SDK changes, your site will be automatically rebuilt and redeployed.
Further reading
Section titled “Further reading”This guide is just the beginning of what you can accomplish with Stainless Docs. In addition to the rest of the documentation here, much of the documentation for Astro can be applied to your Stainless Docs site.